
Fix Distorted Audio for Your Soundboard
We’ve all been there: you find the perfect, hilarious meme clip, but the audio is a complete disaster. It’s either “earrape” loud, muffled by heavy wind, or crackling with that painful digital distortion. While some memes thrive on being “crusty” for comedic effect, a professional soundboard like Instants.Meme requires a delicate balance between viral humor and actual listenability. If your audio is too distorted, users will skip your button.
In this comprehensive guide, I’ll show you exactly how to fix distorted audio for your soundboard, rescuing “fried” clips and polishing them into crisp, high-quality meme buttons that won’t blow out your users’ speakers.
1. Understanding the Enemy: Why is Your Audio Distorted?
Before you can fix the problem, you must diagnose it. In the world of meme curation, audio distortion typically falls into three categories:
Digital Clipping: This occurs when the audio signal is so loud that it exceeds the Digital Full Scale (0 dBFS). This literally “shaves off” the peaks of the sound waves, turning smooth curves into flat lines. The result? A harsh, square-wave crackle.
Background Noise & Interference: This includes ambient hum from cheap microphones, wind noise, or the “hiss” found in old viral videos.
Artifacting: When a video has been compressed and re-uploaded a hundred times across TikTok, Instagram, and YouTube, it loses its fidelity. The audio begins to sound “underwater” or metallic.
To effectively fix distorted audio for your soundboard, you need to address each of these issues using a systematic approach.
2. The 3-Step Rescue Process
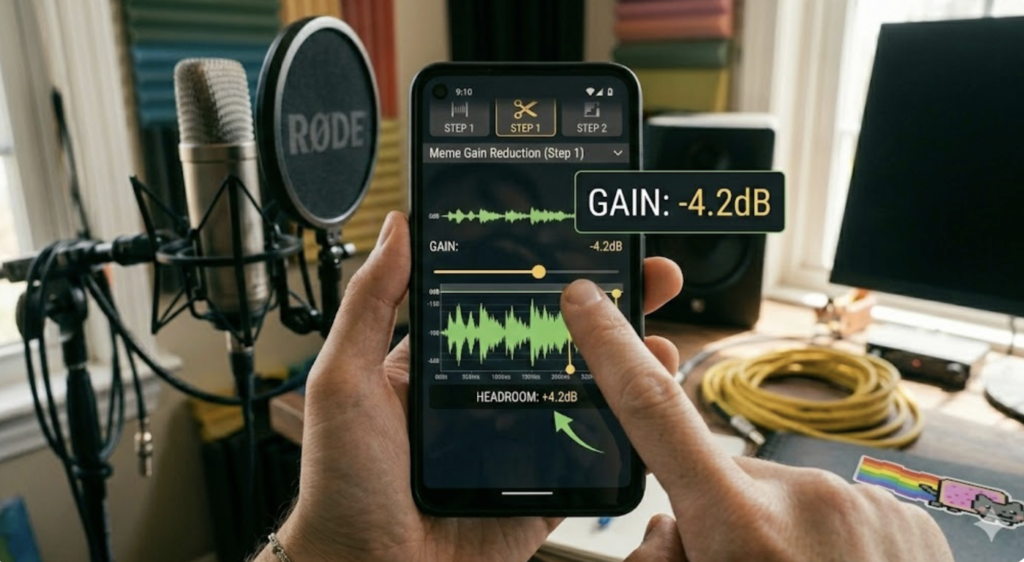
Step 1: Create “Headroom” (Gain Reduction)
The biggest mistake beginners make is trying to repair audio while it is still peaking in the red. You cannot fix a distorted wave if you don’t give the software room to breathe.
Action: Open your file in an editor like Audacity or Adobe Audition and lower the overall volume (Gain) by -3dB to -6dB. This creates “headroom,” allowing restoration algorithms to reconstruct the peaks without hitting the digital ceiling again.
Step 2: AI-Powered Restoration (The 2026 Standard)
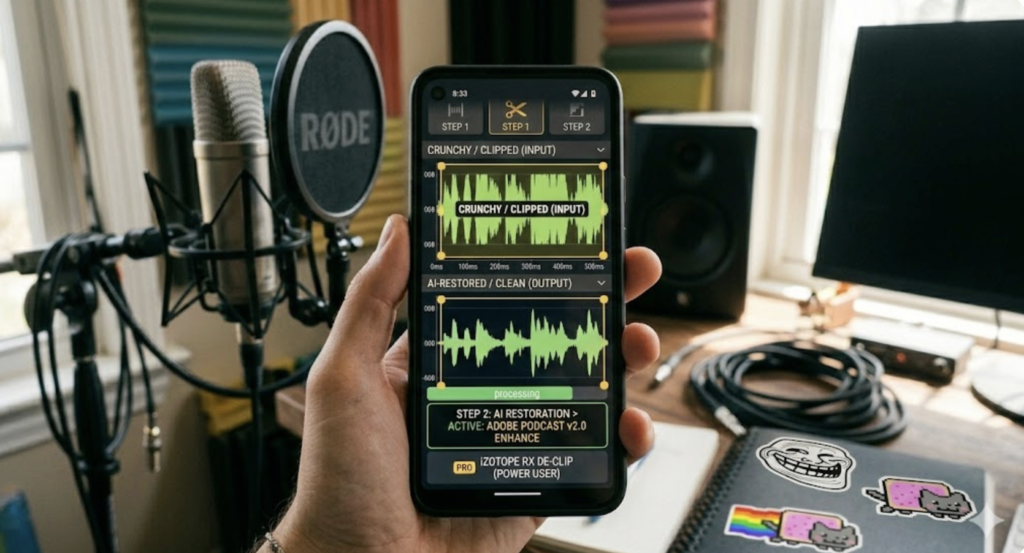
AI has completely revolutionized audio repair. In 2026, you don’t need a degree in sound engineering to save a “crunchy” clip.
Adobe Podcast Enhance (v2.0): This is currently the gold standard for web-based tools. It uses advanced neural networks to re-synthesize missing frequencies. It’s particularly good at making muffled phone recordings sound like they were captured in a studio.
iZotope RX De-clip: For power users, iZotope’s RX suite remains the industry leader. It actually uses intelligent interpolation to “redraw” the clipped parts of a waveform that were lost during recording.
Step 3: Surgical EQ (The “Clean-Up” Phase)
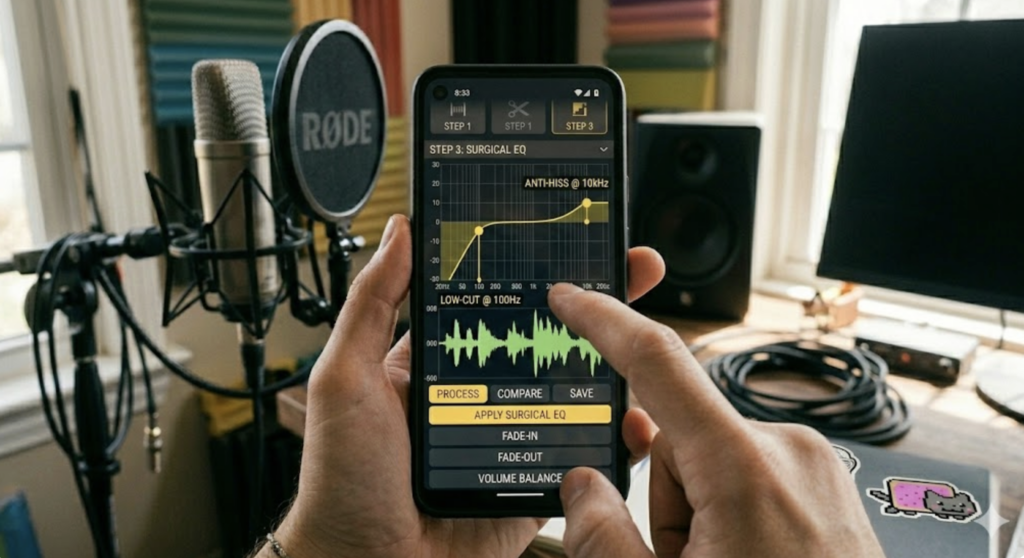
Even after AI enhancement, some “muddiness” might remain. You need to use a Parametric Equalizer (EQ) to target specific problem frequencies:
The Low-Cut (High-Pass Filter): Cut everything below 100Hz. This removes low-frequency rumble and “mic thumps” that add nothing to the meme but hog a lot of energy and cause distortion on small phone speakers.
The “Anti-Hiss” Shelf: If there is a high-pitched whistle, slightly lower the frequencies above 10kHz. This smoothens the sound and makes it less piercing for headphone users.
3. Advanced Deep-Dive: When to Keep the “Crunch”
A crucial part of learning how to fix distorted audio for your soundboard is knowing when not to fix it too much. In meme culture, the “soul” of the joke often lies in the low-quality aesthetic.
If you are editing a clip of a high-intensity fail or a “bass-boosted” meme, over-processing can make the audio sound robotic or “hollow.” The goal of a soundboard artist is Clarity, not Perfection. You want the audience to understand what is being said or heard, even if the texture of the sound is still aggressive.
Pro Tip: Use a Limiter instead of a Compressor. A limiter acts as a hard ceiling. It allows you to keep the “loud” feeling of a meme while ensuring the output never crosses -0.1dB, protecting your hardware and the user’s ears.
4. Final Checklist: From Repair to Upload
Once you have managed to fix distorted audio for your soundboard, don’t just hit export. Follow this checklist to ensure your file is “Instants-ready”:
Normalization: Use Audio Normalization to bring the peak volume to exactly -1dB. This ensures that when a user switches between your “Ting Ting” sound and an “Epic Fail” sound, the volume levels are consistent.
Precision Trimming: Now that the audio is clean, use the techniques from our guide on how to trim MP3 with 0.1s precision to make the button hit instantly.
The “Crushed Speaker” Test: Listen to your clip on the worst speakers you own—usually your phone’s built-in speaker. If the repaired audio sounds clear there, it will sound amazing everywhere else.
Conclusion: Why Quality Matters for Retention
Providing a way to fix distorted audio for your soundboard is ultimately about user retention. People might click a distorted button once for the joke, but they won’t add it to their “Favorites” if it causes physical discomfort to hear. By taking two minutes to apply these de-clipping and EQ techniques, you elevate your content from a low-effort post to a professional asset.
Mastering audio restoration allows you to pull samples from the darkest corners of the internet and turn them into viral hits on Instants.Meme. Whether you are working on the Evolution Mega Knight Soundboard or creating your own custom board, remember: clear audio leads to more shares, more clicks, and better memes.
Do you have a file that is so distorted it seems impossible to save? Drop a link in the comments or send us a message—we love a good audio challenge and might feature your “unfixable” clip in our next tutorial!